Ubuntu Server 20.04 installation and basic setup
by

Andrew Golasowski
Today we will install and secure an Ubuntu Server and set up basic services. For simplicity, I will use a VirtualBox VM but the guide can be applied to any other Ubuntu supported platform.
Ubuntu installation
At first, download an installation ISO for the Ubuntu server from the official page.
If you use a VM, just mount the ISO to the VM (note: do not forget to enable Live CD/DVD option if use VirtualBox and Live CD/DVD installer, which is the default one, otherwise the setup may hang on device probing screen). To install the Ubuntu on the real hardware, you have to create a bootable USB (or DVD, which is way slower) using Rufus or similar tool.
Choose a USB (or a DVD drive) as a primary boot device in the UEFI (BIOS) and reboot the device.
On successful boot the installer will check the installer integrity and after a while you will se the following screen:
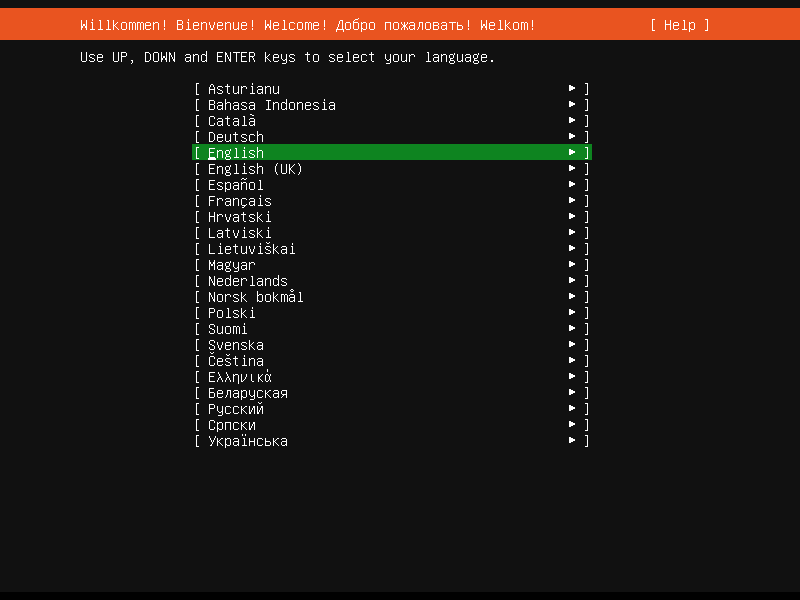 Ubuntu installer - language selection
Pick your preferred language and a keyboard layout. After that you will see a network configuration page. Installer will try to get an IP via DHCP but you can select your preferred adapter and set a static IP.
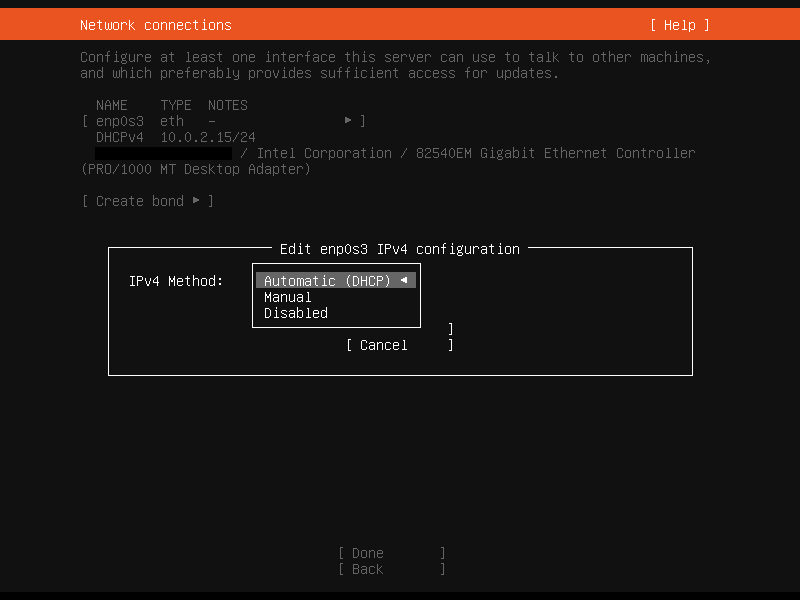 Ubuntu installer - network configuration
You can skip the proxy and mirror if you do not need to specify anything.
Then you will need to configure partitions.
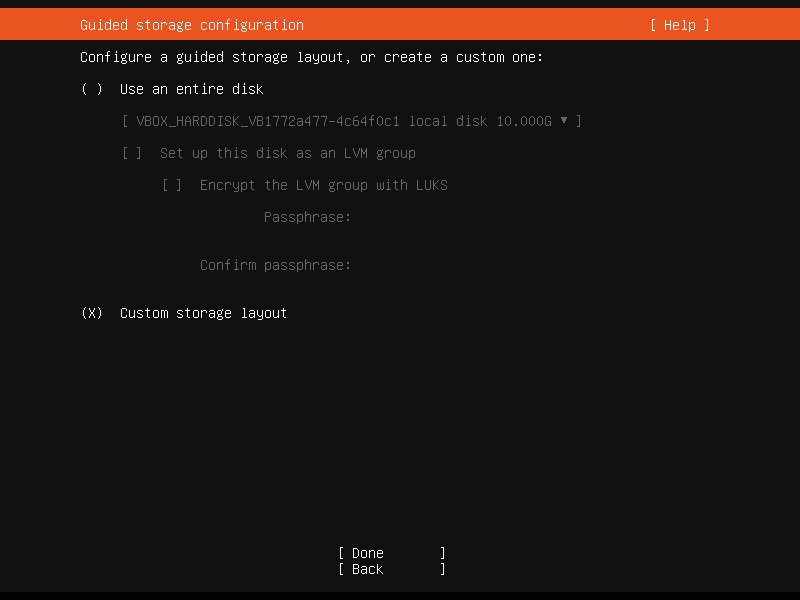 Ubuntu installer - storage configuration
Setup can configure the partitions for you automatically. In that case, you will only need to decide whether to use the LVM. It has many benefits (see this nice thread at askubuntu) but it is more complex.
We will have a look at the custom storage layout.
At first, select your drive from AVAILABLE DEVICES, click enter and select Add GPT partition. Specify the size of the main system partition (and optionally leave ideally two times the RAM capacity free for swap), select ext4 format and / mount point. GRUB partition will be created automatically.
Secondly, if you want, you can create the “swap” partition, which is used e.g. when you run out of RAM. It is optional - see Is swap area required?. The process is similar, just select swap as format.
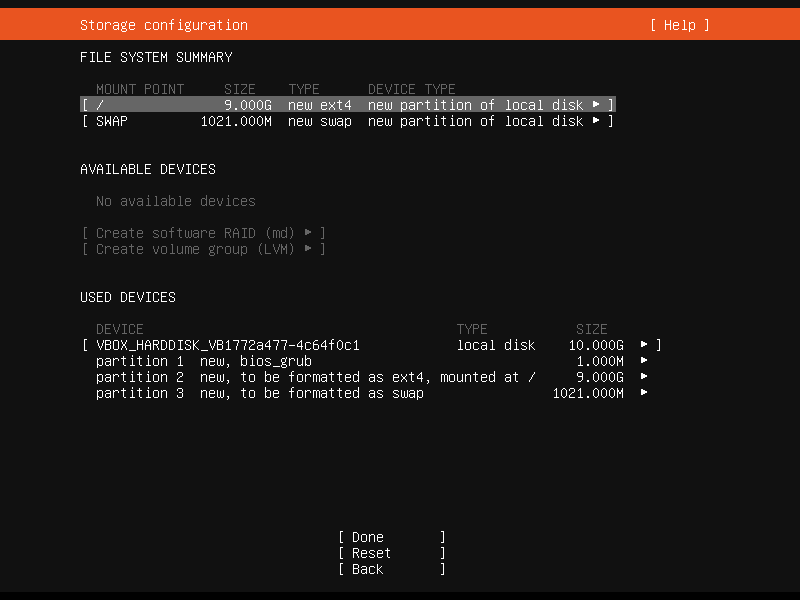 Ubuntu install - storage summary
Optionally, you can create other partitions on other drives as well. Then click continue and fill in the profile information.
You can install the ssh server during installation process which I recommend, because it will allow a remote access and it is a standard for server installs. Then you can select some packages to be installed. I usually skip this step, because all the services listed can be installed anytime later.
Wait for the install to finish and then you can reboot the system. You can now access the machine either locally or via SSH.
Remote access via SSH
On Linux, you can connect to the remote machine with the ssh utility:
ssh username@ipOn Windows, you can use the PuTTY utility:
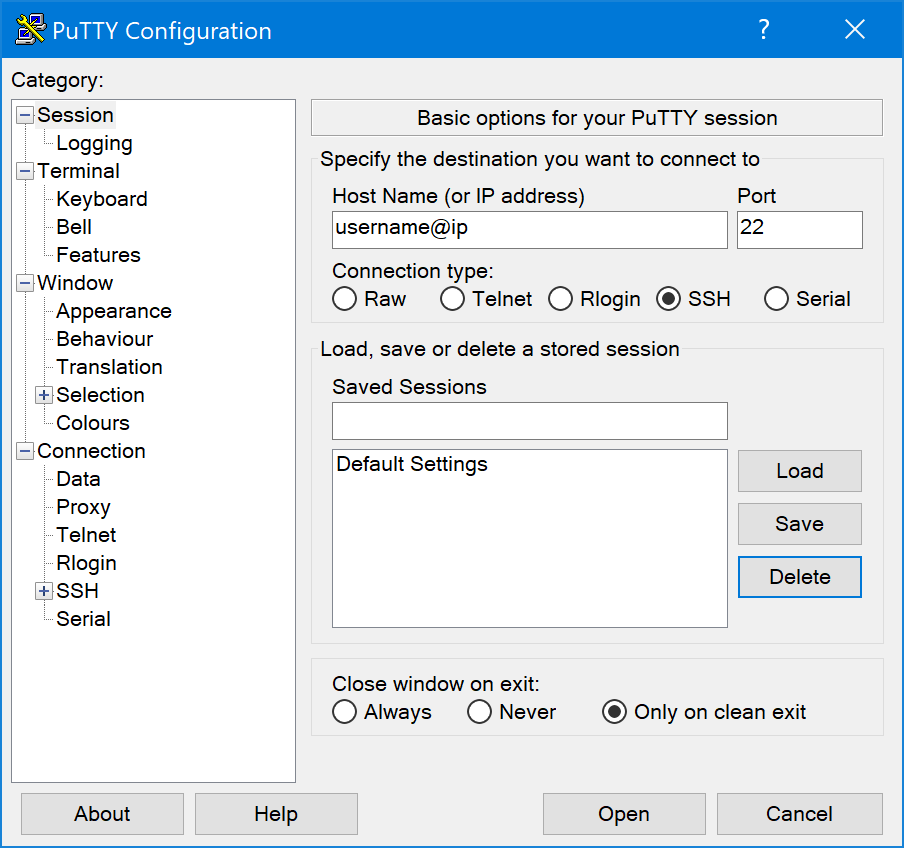 PuTTY
PuTTY
ssh setup
If didn’t choose to install the ssh server during system installation, you can install the server with the following command:
sudo apt install openssh-serverIt will work out of the box, but I recommend doing some more steps to enhance the security of the ssh server, especially if it is exposed to the internet.
Whitelisting users
You can manually specify which users will be able to log in.
sudo nano /etc/ssh/sshd_configSearch for AllowUsers and DenyUsers. Following example will allow foo to log in and block bar and tux.
AllowUsers foo
DenyUsers bar tux
Restart the SSH server daemon to apply changes:
sudo service restart sshKey-based authentication
It is a good idea to disable password logins and enforce key-based instead. You will log in using a identity file instead of using username-password combination.
At first you need to generate a so-called key pair on the client machine (the machine you will use to log in to the server you just installed). You will generate two keys - public key, which you will send to the server and private key, which is stored on the client machine and it is used to log in.
On Linux you can use ssh-keygen:
ssh-keygen -t ed25519Note: you can specify different key type with -t e.g. for compatibility reasons.
Your private key will be save to the specified location without suffix. The public key will have suffix .pub.
On Windows you can use PuTTYgen. Select Ed25519 (or other) and click Generate:
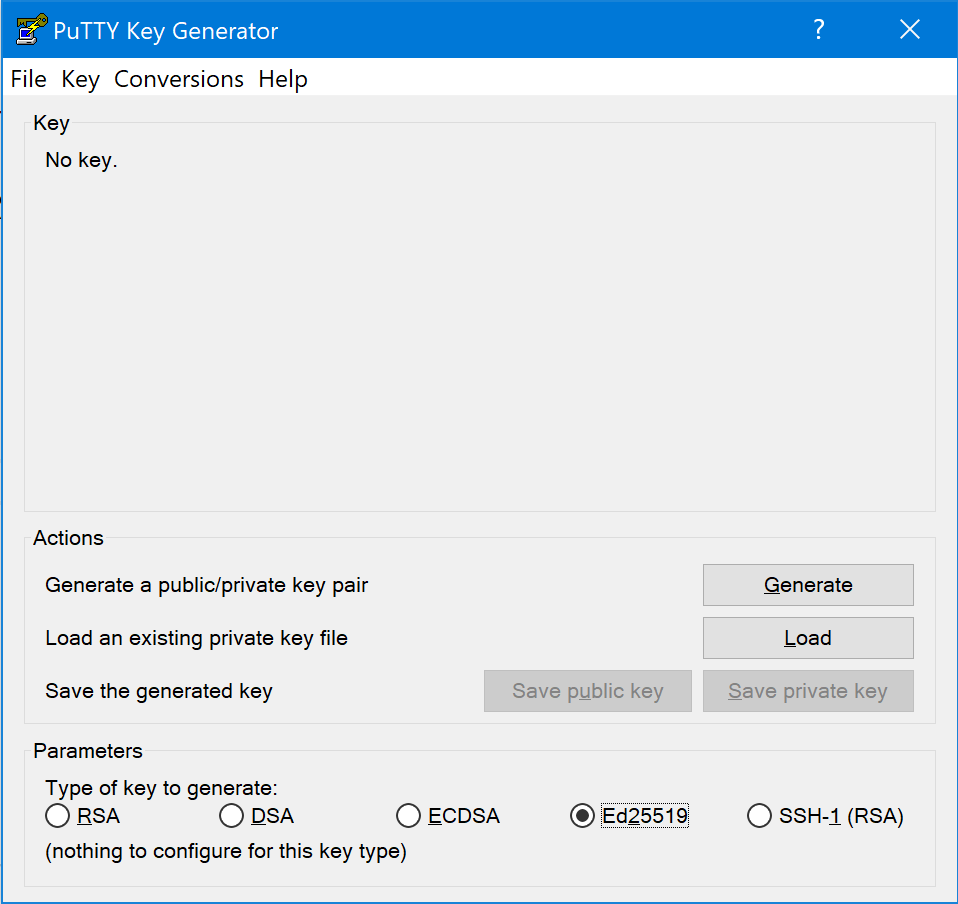 PuTTYgen
Then you can save the public and the private key.
The public key needs to be copied to the server. A simple way on the Linux is using the ssh-copy-id tool:
ssh-copy-id -i /home/username/.ssh/keyfile.pub server_username@server_ipOr manually by copying the contents of the public key file and adding it to the authorized_keys file on the server. On Linux this can be done in the terminal:
cat /home/username/.ssh/keyfile.pub | ssh server_username@server_ip 'cat >> ~/.ssh/authorized_keys On Windows you can use a tool like WinSCP to connect to the filesystem via SSH and modify the authorized_keys file manually.
Now you can log in using the key:
ssh -i /home/username/.ssh/keyfile.pub server_username@server_ipNow we will log in to the server again and modify some settings to disallow password auth.
Open SSH config:
sudo nano /etc/ssh/sshd_configFind and change these lines in the config to no:
ChallengeResponseAuthentication no
PasswordAuthentication no
UsePAM no
Restart the SSH daemon again:
sudo service restart sshufw setup
There are many tools which provide packet filtering, such as iptables. The configuration is usually complicated. Luckily there is a utility which simplifies the process - ufw. On Ubuntu it’s installed by default.
Enable the ufw:
sudo ufw enableThen you can use this command to allow port access:
sudo ufw allow *port*This will deny the access:
sudo ufw deny *port*There’s also a handy rule for limiting the ssh login attempts:
sudo ufw limit sshThis will deny a connection from the IP which tried to connect 6 and more times in the last 30 seconds.
For more details refer to the ufw man page:
man ufwfail2ban setup
And the last handy tool we will install is the fail2ban utility. It scans the log files and checks for any suspicious activity. If it detects e.g. multiple failed login attempts, it will ban the IP for specified time (or forever).
At first, install the utility:
sudo apt install fail2banThen, copy the configuration file:
sudo cp /etc/fail2ban/jail.conf /etc/fail2ban/jail.localNow we need to set up a “jail” for malicious SSH connections. Open the newly created file in an editor:
sudo nano /etc/fail2ban/jail.localNow add or edit this section:
[ssh]
enabled  = true
port     = ssh
filter   = sshd
logpath  = /var/log/auth.log
maxretry = 6
To ban an IP forever after 6 unsuccessful attempts, add this line:
bantime = -1There are many different options. As always, take a look in the manpages:
man fail2banAnd that is all! Congratulations and thank you for reading.